An easy to follow rooting guide for Sony Xperia Z3+ (Sony Xperia Z3 Plus) is now available at TrueAndroid. Rooting is absolutely necessary to perform system level tweaks. Also few advance apps that available at Play store require root. In this guide we used custom recovery TWRP. You can follow this guide to install TWRP: Sony Xperia Z3+ : Unlock & Install TWRP Recovery 3.0.1-0 – Easy Tutorial.
To root Sony Xperia Z3+ we will use Magisk utility. Magisk is popular mostly because its ability to bypass Google’s SafetyNet system. With Magisk, you can have root and custom mods while still using services like Google Pay. It works by leaving the system partition untouched and modifying the boot partition. That’s why it’s referred as a “systemless” root method.
Related Reading: Benefits Of Rooting Android Devices
Warning: We at True Android produce tutorial to help out fellow Android users but all this guide are educational purpose only. You should try this guide at your own risk. Neither we nor the developer should be responsible if your Android device experience a damage after following this tutorial. Also remember,this guide is only applicable for Sony Xperia Z3+. Don’t try this guide in any other Android device. It may hard brick your device.
Although the method don’t wipe your data but we still recommend you to back up it. You may follow our Android backup guide.

How to root Sony Xperia Z3+ easily with Magisk
Step 1: Download Magisk zip.
Step 2: Copy downloaded zip file to your device memory.
Step 3: Boot into recovery mode. To boot into recovery first turn off your Sony Xperia Z3+ and then press and hold Volume Down and Power button together. You can also boot into recovery without key combination.

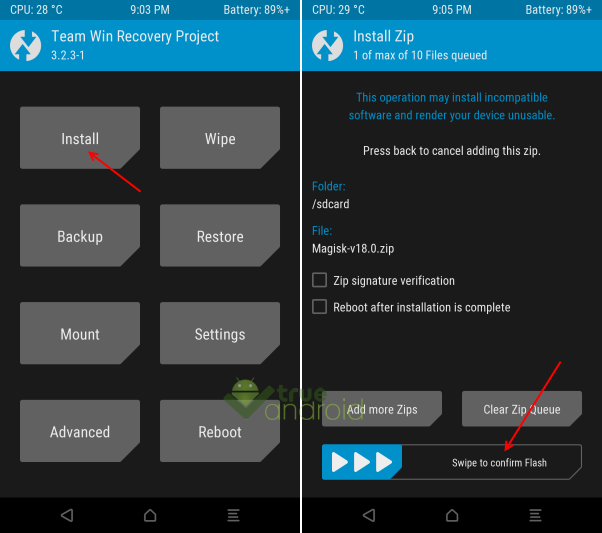
Step 4: Tap on Install, then browse to the location where you saved the files and tap on the Magisk zip file. Now at the bottom of the screen, do a swipe on the Swipe to confirm flash option to begin flashing.

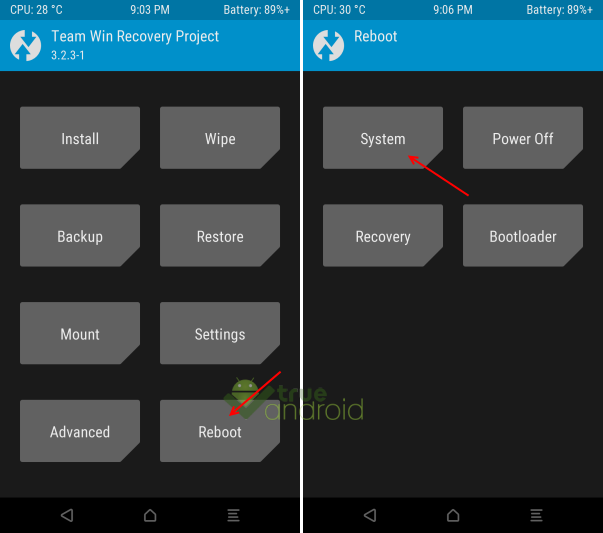
Step 5: When the installation is completed, go back to the main recovery menu and tap on Reboot and then, tap on System to reboot your device.

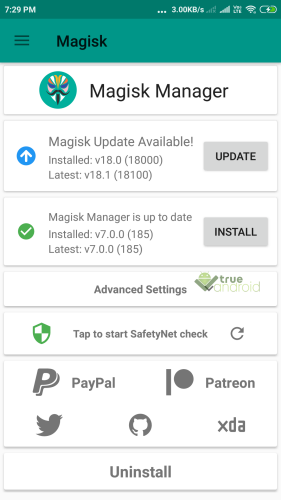
Step 6: Now check whether Magisk Manager is installed. If not then download the apk and installed it manually. You may need to allow unknow sources when asked to install it. Make sure you have latest Magisk manager installed.

That’s it. You now have a rooted Sony Xperia Z3+. You may checkout best apps for rooted Sony Xperia Z3+. [via XDA]


