If you are a Nokia 4.2 user and looking for a way to unlock the bootloader, then we have a good news for you. However, this bootloader unlocking procedure isn’t something we used to do other devices. It require some hardware disassembly. If you ready to go for this adventure then continue reading.
This guide is shared by hikari_calyx@XDA (donate); we just re-sharing it with permission.
Warning: This guide requires disassembly, so you will definitely lose the warranty! Do it at your own risk! Neither TrueAndroid nor hikari_calyx are responsible if anything happen to your device.
Since tricking development options for allowing “OEM unlocking” no longer works on latest security update; we need to go little bit further.

What we need to have:
– a Nokia 4.2 unit that you finished back cover and upper plastic shell removal
– tweezers, and probably a standard philips screwdriver
– QPST (use at least 2.7.474) or any other app that could access the EDL, and Qualcomm USB port drivers are installed
– Latest Google Platform Tools
– Full backup of your userdata
Step 1: Trigger the phone to EDL mode, then change the driver to “Qualcomm HS-USB QDLoader 9008”
Please take a look at below pic, about the location you need to use tweezers.

For Windows users:
If the driver is already indicated as “Qualcomm HS-USB QDLoader 9008”, get to Step 2.
If the driver is indicated as either “QHSUSB__BULK” (For users who have installed Windows Device Recovery Tool before) or “Qualcomm HS-USB Diagnostics 9008”, you must change the driver to “Qualcomm HS-USB QDLoader 9008”.
After driver changed, you need to disconnect the phone, disconnect and reconnect the battery ribbon cable, then trigger the phone to EDL again.
For this guide we assume the COM port number is 8 (COM8).
Step 2: Write config partition
As we already know, config partition is also the frp partition. You need to create a config partition image that has “OEM Unlocking” function enabled, which need to alter the last byte, then change the overall checksum to make the config file valid. For your convenience, I’ve created one.
Now download and extract the attachment below.
Use QFIL included in QPST to load the firehose file. Choose “Flat Build” and choose the “prog_emmc_firehose_8937_ddr.mbn” you extracted from the attachment.
Choose “Tools” – “Partition Manager”, then wait for the partition list appear.
As “Load Image” seems not reliable, we have to use command to write it manually.
For 64-bit Windows users, the command is:
“C:\Program Files (x86)\Qualcomm\QPST\bin\fh_loader.exe” –port=\\.\COM8 –search_path=D:\path\to\where\you\extracted\N32_N42_unlock –sendimage=config.img –start_sector=16583680 –lun=0 –noprompt –showpercentagecomplete –zlpawarehost=1 –memoryname=emmc
If you use 32-bit Windows, you need to remove the ” (x86)” (within space, without quotes) in the command above.
Step 3: Trigger the phone back to fastboot mode
Now hold the Volume down key, keep the phone connected, close the partition manager, then your phone will exit EDL mode and enter Fastboot mode directly.
Now check the unlock ability with following command:
fastboot flashing get_unlock_ability
Expected output:
get_unlock_ability: 1
Step 4: Unlock the bootloader!
And you can unlock the bootloader with familiar commands.
fastboot flashing unlock_critical
Confirm unlock on the phone, then keep the volume down key pressed while the phone is erasing userdata.
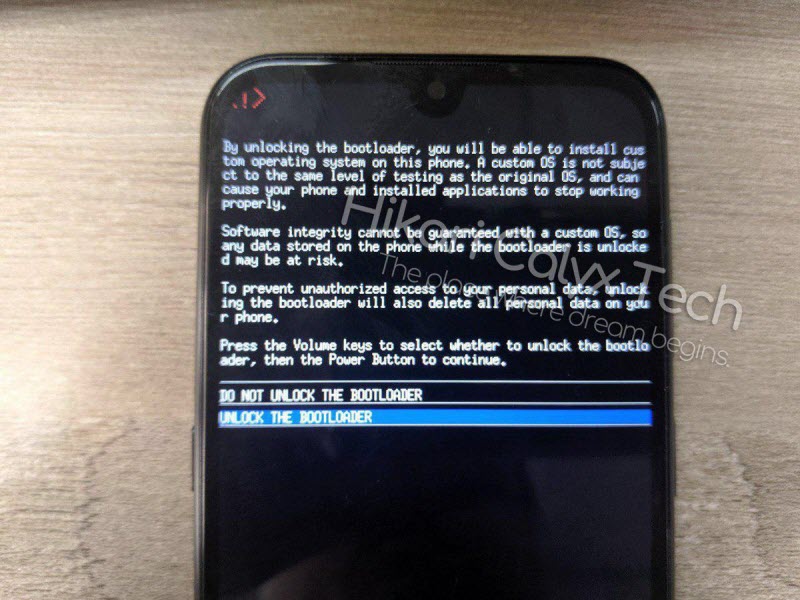
Your phone will boot to fastboot mode again, and then:
fastboot flashing unlock
Confirm unlock on the phone again.
All done, that’s how the bootloader is unlocked. You can reassemble the phone. [source]

